Animating Anaglyphs
The trouble with 3D anaglyph images is that I don’t have a pair of blue/red spectacles. However, given a stereoscopic image, you can turn it into an animated gif using Wiggle Stereoscopy to give a bit of a 3D effect.
I first saw the animated gif technique a few years ago when looking at Europeana GifItUp. I had first thought that I might be able to automate their creation based on the stereoscope images in the collection, but it turned out that the manual technique of carefully lining them up is hard to beat, and that even when I did get it right, many of the images looked a bit rubbish. I turned my efforts to other animations instead.
However, the recent Mars Landing, and a tweet about reconstructing a colour image from separate RGB channels, inspired me to have a look at some Mars images. I stumbled across some anaglyph images of Mars and wondered if I could try again.
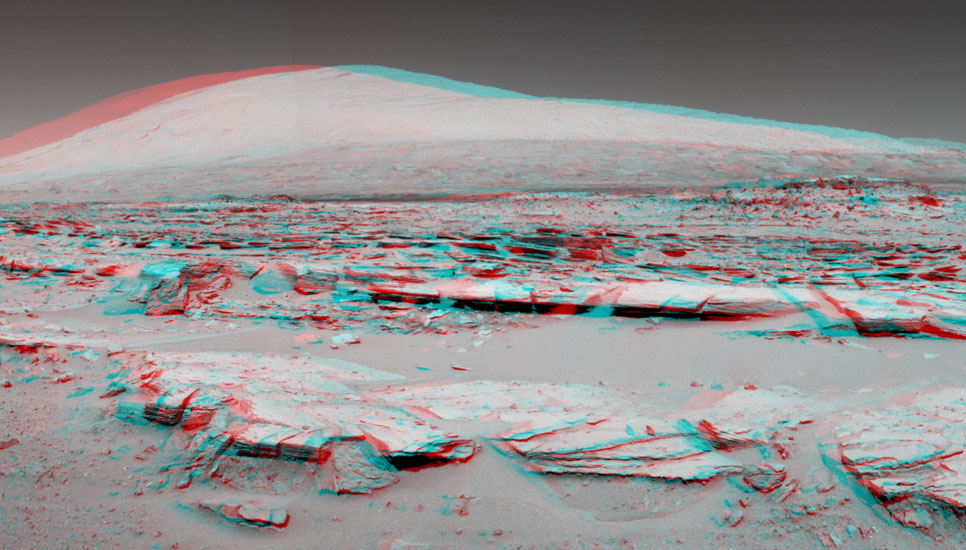
A good example is this one from the Insight mission:
Which can be rendered as an animated gif like this:
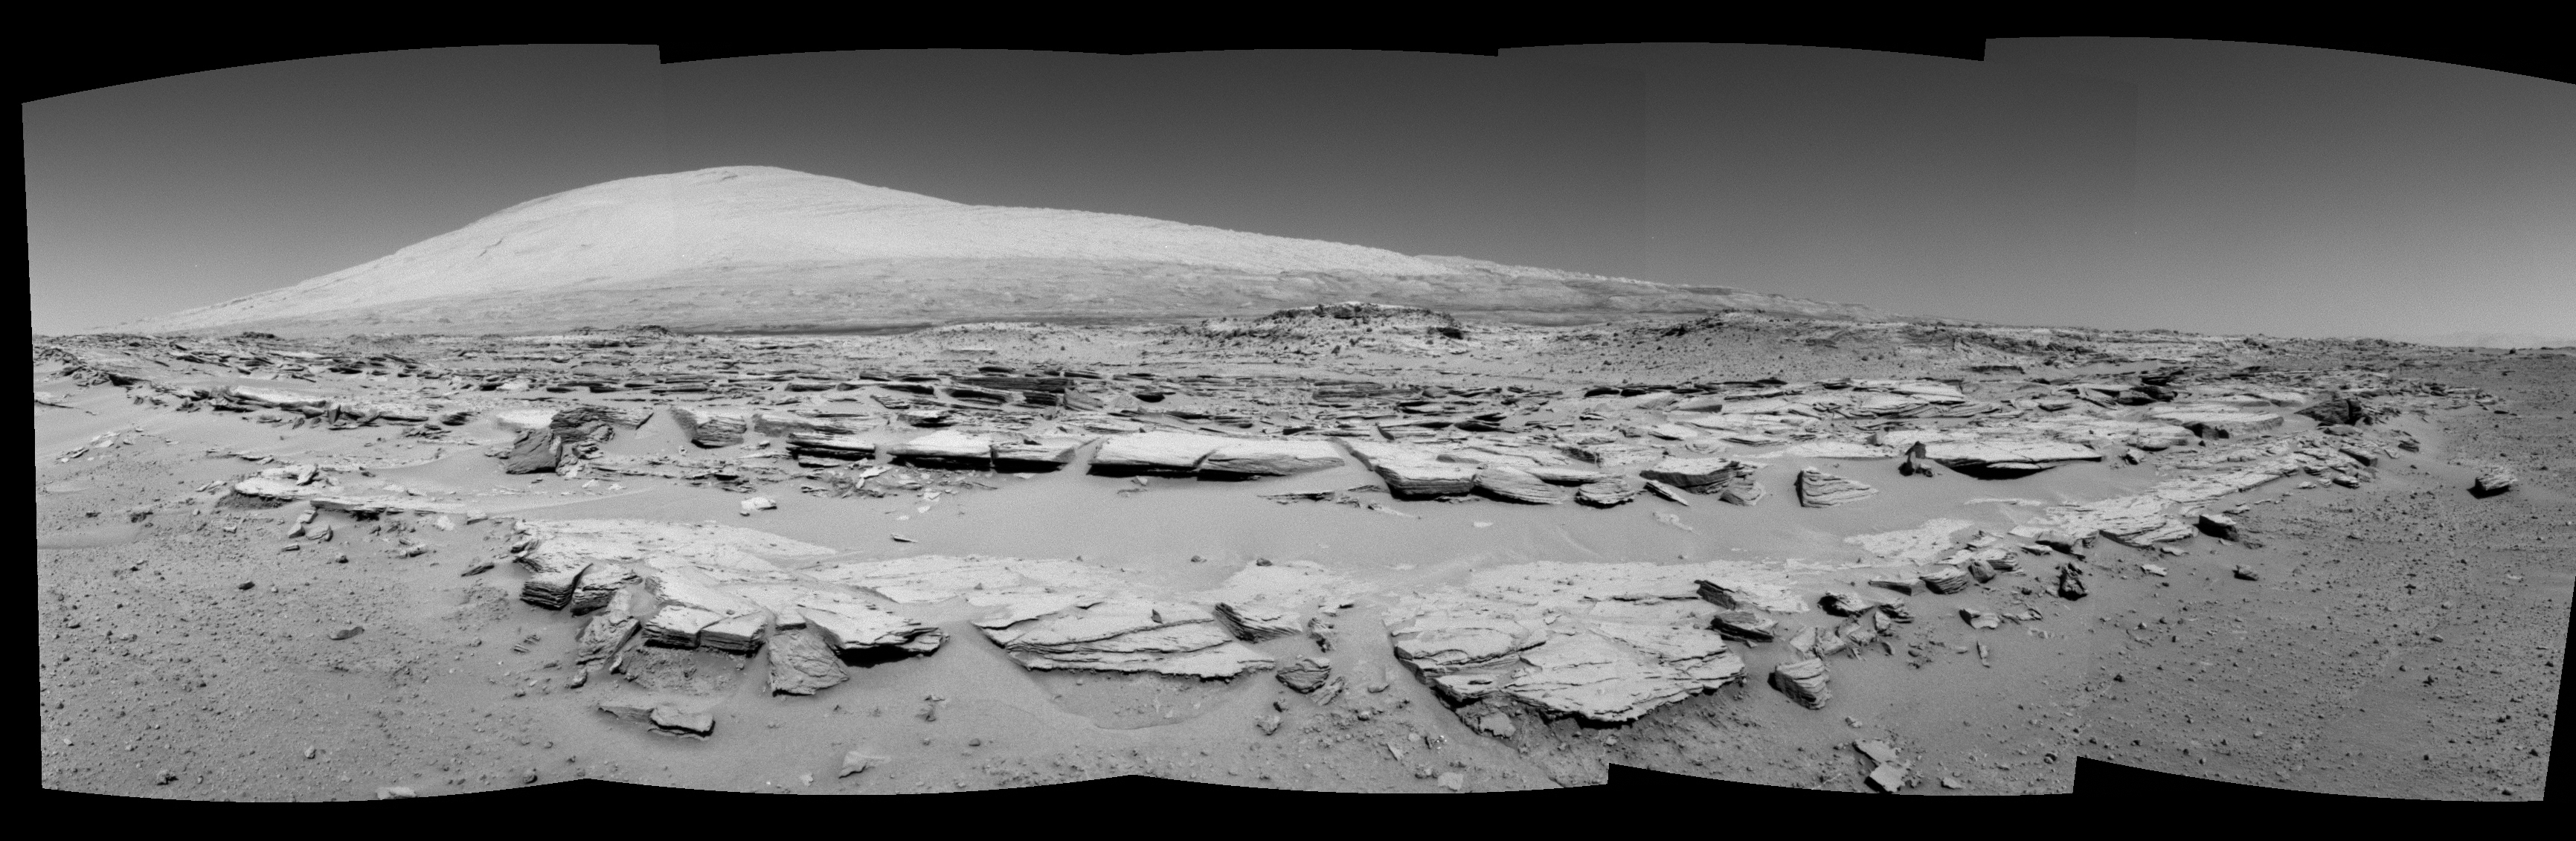
A 3D anaglyph image is essentially two greyscale images, each converted to one
colour, printed in the same position. So (in the case of the Nasa images, which
are red and blue) this is simple to extract.
In Pillow,
0 is the red channel and 2 is the blue.
from PIL import Image
with Image.open('PIA17948.jpg') as img:
    left = Image.new('L', img.size)
    right = Image.new('L', img.size)
    left.putdata(img.getdata(0))
    left.save('PIA17948.left.jpg')
    right.putdata(img.getdata(2))
    right.save('PIA17948.right.jpg')
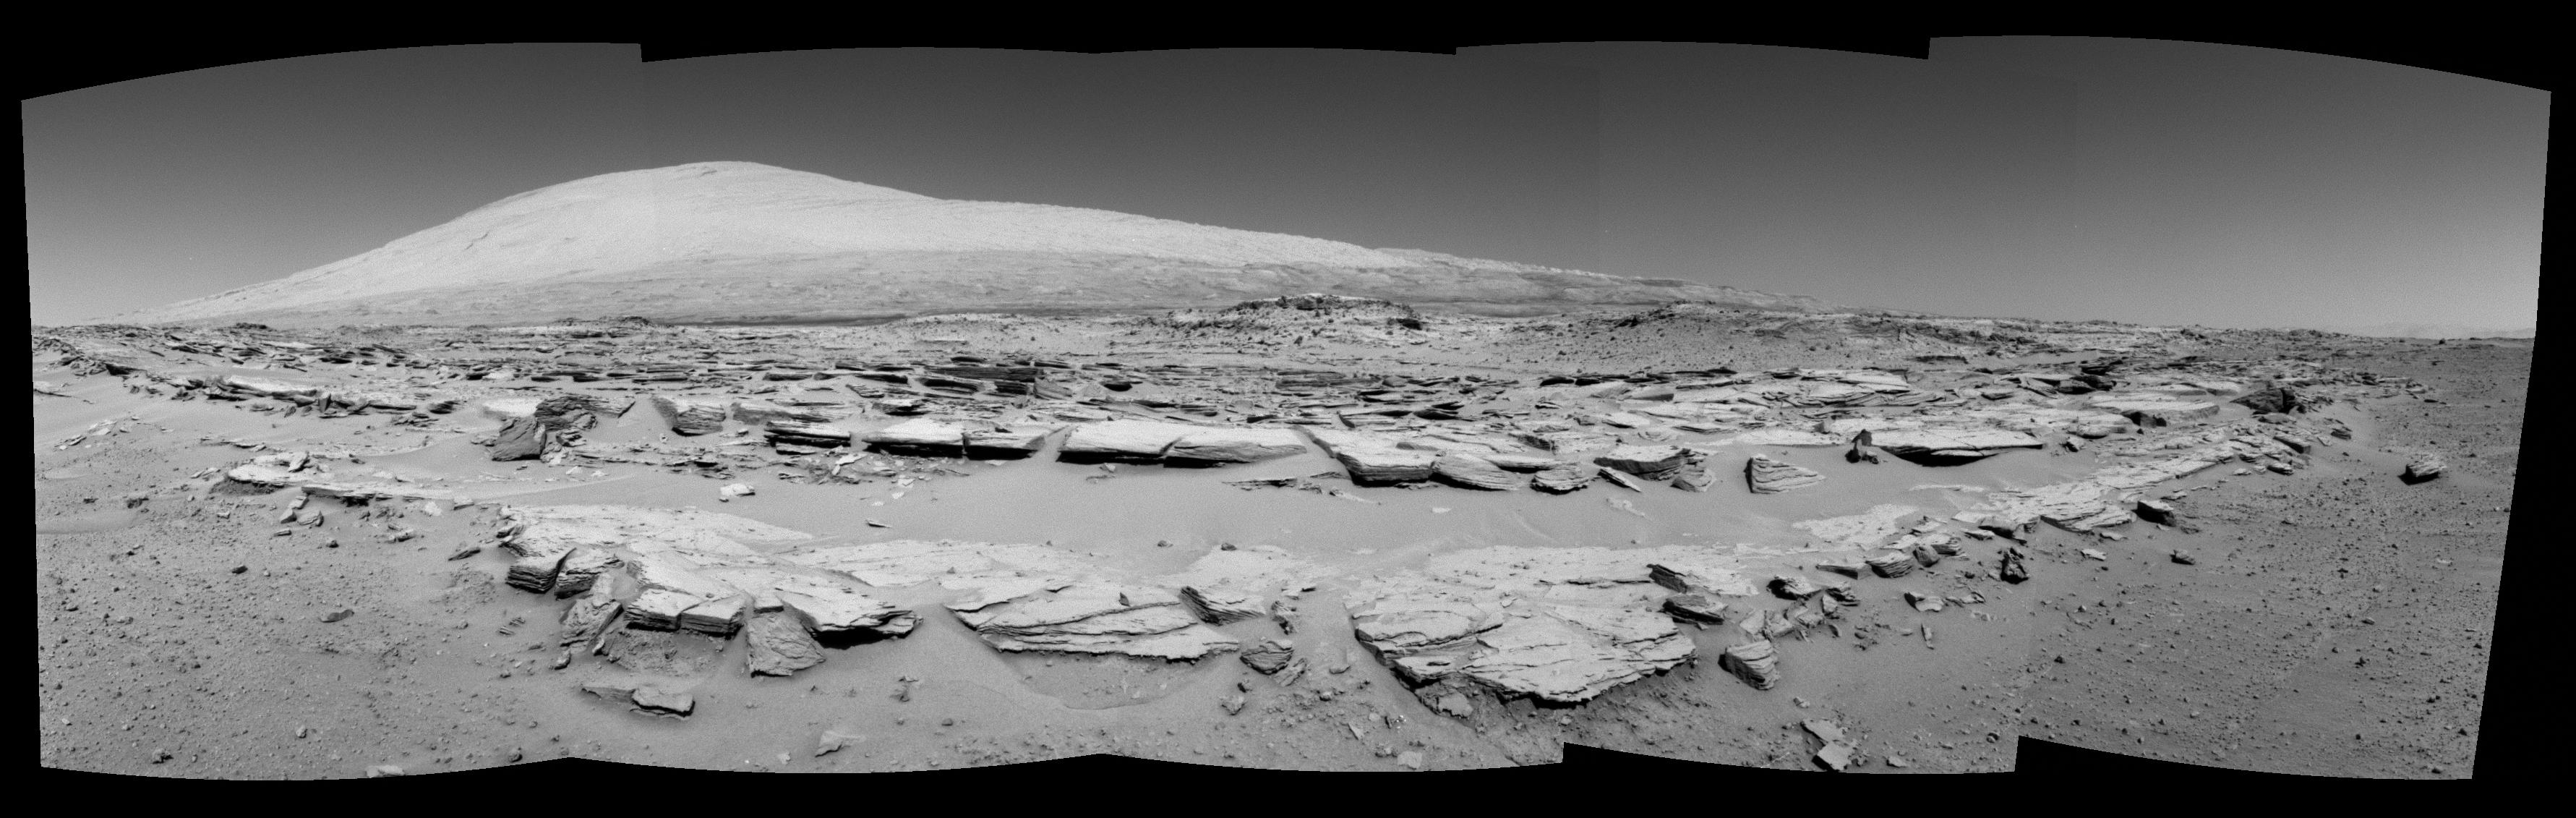
Having done this, it should simply be a matter of creating a gif, flicking between the two images. This gives a reasonable 3D effect:
...
    left.save(
        "PIA17948.both.gif",
        save_all=True,
        append_images=[right],
        duration=10,
        loop=0
    )

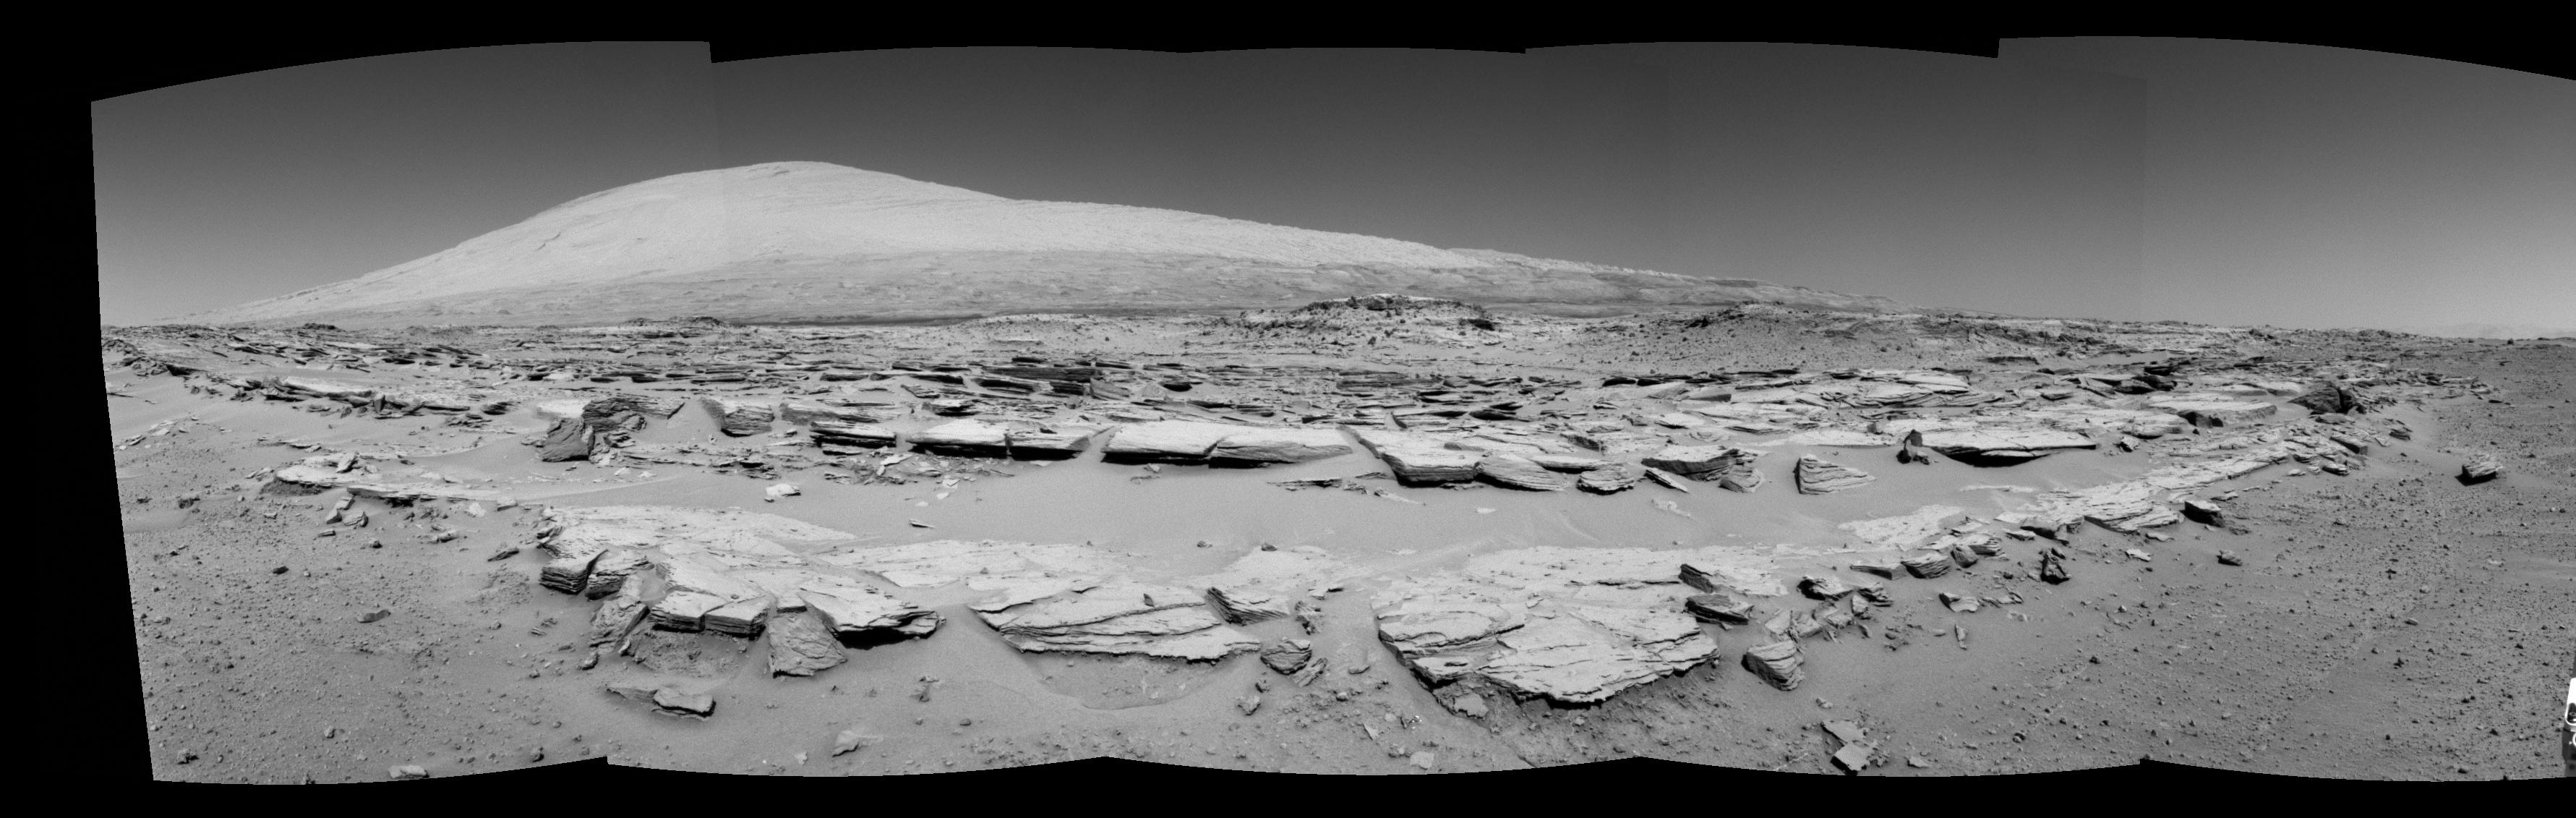
However, there is a difference between what a stereoscope image represents, and what a stereoscope animation represents. This is where the complexity around creating a general-purpose automatic solution arises.
A stereoscope image, or pair of images, works by presenting two slightly different images to each eye. The impression of depth comes from each eye seeing something slightly different as it does in real 3D life.
In the stereoscopic animation, both eyes are seeing the same thing. The impression of depth comes from motion parallax, the animation is as though the viewer is rapidly shifting their head from side to side. For this to work well, something in the distance has to stay the same in both images.
In the case of the example image, the wobbly Junda outcrop ruins the effect.
Fortunately, the outcrop is a sufficiently obvious landmark in the very background which can be used to come up with an appropriate offset for each eye on Curiosity. (about 100px). This can be cropped from the left of the right image, and the right of the left image, thus:
with Image.open('PIA17948.jpg') as img:
    left = Image.new('L', img.size)
    right = Image.new('L', img.size)
    left.putdata(img.getdata(0))
    left = left.crop((0, 0, img.width-100, img.height))
    right.putdata(img.getdata(2))
    right = right.crop((100, 0, img.width, img.height))

    left.save(
        "PIA17948.both.gif",
        save_all=True,
        append_images=[right],
        duration=10,
        loop=0
    )
To come up with the final animation:
The same script produces good output for other Mars anaglyphs, such as this one of Mount Remarkable
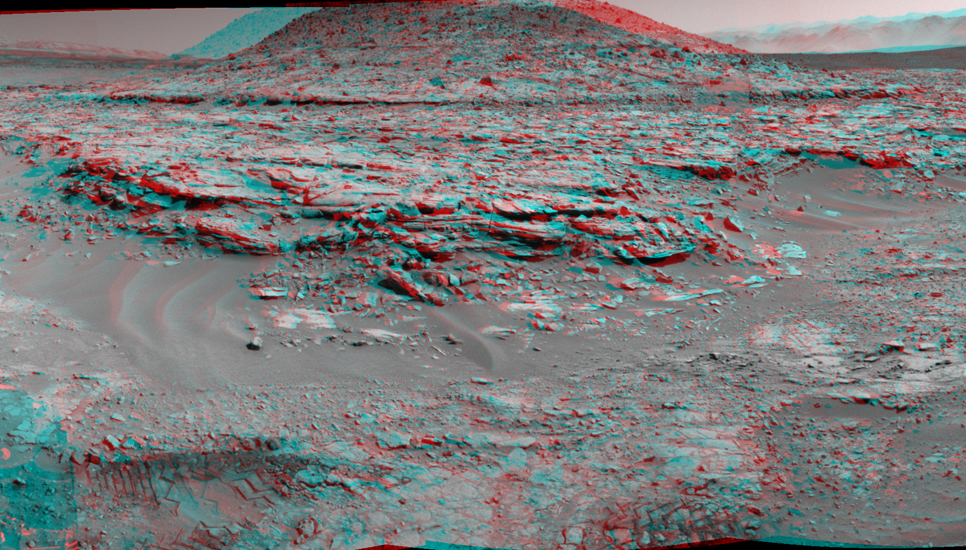

However, those (like the Mount Remarkable image) that have parts of the rover, or other obvious large objects in the extreme foreground may benefit from cropping out the bottom of the image, as the way it jumps back and forth is not particularly beautiful.
with Image.open('pia18084.jpg') as img:
    img = img.crop((0, 0, img.width, img.height-500))
    ...

Further improvements could be made by getting rid of the black borders and adding view interpolation, but I think that the results are pretty tasty for less than ten lines.